Meteor is a great Node framework. I love it. Mainly because it is very easy how to prepare a development environment. Just a simple command line. You don't need to worry about the version of Node, database, anything. But when you go to put in production, you have two options: use a specialized host to meteor (Meteor Cloud, Scalingo, NodeChef, etc.) or build your own environment.
I think there are pros and cons to each scenario, and I don't want to discuss them in this article. Here, I just want to show how to prepare your Meteor application to be deployed using a Docker Compose in your own production environment.
With Docker Compose, you can have sure that your application is ready to go to production. You can run it in your own machine, in a server with Docker compose, or in a Docker Swarm cluster.
Now I'm going to stop talking and let's get down to business.
I don't want to teach about Docker concepts, so I'll show a Dockerfile ready, and I'll comment on every step I did.
Creating a Meteor simple application
We'll use a default Meteor Blaze application to complete the task. Choose a specific place in your computer and execute this command:
meteor create --blaze meteor-testBuilding my application
We need to build the application to be used inside the docker. Remember, here I'm just showing a simple example to build a Meteor application. There are many other parameters that you can be setting in build time.
Go to the path of your application and execute this command:
cd meteor-test
meteor build --allow-superuser --directory ./build/
The above command will create a build folder with a Node code built inside. We'll use it inside de Dockerfile in the next step.
You will have a warning message like this below, just ignore it:
WARNING: The output directory is under your source tree.
Your generated files may get interpreted as source code!
Consider building into a different directory instead
meteor build ../output
Preparing the Dockerfile
This step is to create a docker image to be used by Docker Compose (or a Stack in the Swarm). Below, is the complete and simple Dockerfile:
FROM node:14.17.5-alpine
LABEL maintainer="Ricardo Aragao"
LABEL meteor.version="2.3.5"

COPY ./build/bundle /bundle
RUN (cd /bundle/programs/server && npm i)

USER node

CMD node /bundle/main.jsCommenting on each line:
FROM: define what node image you'll use as a base to create the image of your application. There are two important points here:
- The chosen version should be the same as your meteor version. In this case, we are using meteor version 2.3.5 which uses Node version 14.17.5. You can verify in the Meteor Changelog;
- For this simple example, we are using Linux distro alpine, but sometimes there are some problems with alpine, then use slim to test. Ex:
FROM node:14.17.5-slim. You can see other options in the Docker Hub.
LABEL: it is just to add metadata to your file.
COPY: remember that we built that application outside of docker, then this command is to copy the result of the build (a node application) to inside the Docker.
RUN: it will execute a shell command inside the docker in build time. In this case, we are executing the npm i to install all NPM dependencies of your application because meteor build doesn't do.
USER: define the user we'll use to run the node app.
CMD: will execute the application.
Building a Docker Image
After the preparation of Dockerfile, save it in the root of your Meteor project and run this command to build a Docker image:
docker build -t my-meteor-test:latest .When ended, you can check the image using the command:
docker imagesThe result will be like this:
REPOSITORY                                                          TAG              IMAGE ID       CREATED       SIZE
my-meteor-test                                                      latest           70abf23d15a3   2 hours ago   271MB
Now you have your application Docker image ready to use with Docker Compose. You can remove the build folder created, you don't need it after this step.
Preparing the Docker Compose file
I prepared a small Docker Compose file as an example:
version: "3.7"

services:
  my-app:
    image: my-meteor-test:latest

    ports:
      - 80:3000

    environment:
      NODE_ENV: production
      ROOT_URL: http://localhost
      PORT: 3000
Differently from Dockerfile syntax, a docker-compose file is a YAML file. Each indentation means that that line is inside the other level. By default, we are using 2 spaces to define an indentation.
Commenting on each line:
version: define the version of docker-compose. See the documentation about versions here.
services: define each service (or application) we need to start. In this case, we just will deploy our app.
my-app: the name that I chose for my application.
image: the image's name that I want to use for my service, in this case, the image we built.
ports: the map of the external port to the internal port. 80 is external and 3000 is internal in the example.
environment: here you can put all environment variables that Node or Meteor needs to run.
NODE_ENV: define what environment Node is running.
ROOT_URL: the URL that the app will respond to based on the port exposed.
PORT: port that the application will be running inside the container.
For this simple example, I put just the minimal of environment variables are necessary to power on an app. I'll show others common variables that you will need for real applications:
MONGO_URL: the URL of MongoDB that you use for your application.
MONGO_OPLOG_URL: the URL of OPLOG of MongoDB.
METEOR_SETTINGS: load a string with the settings to Meteor (is a JSON format stringified).
Environment variables can be set on Dockerfile too, but I prefer to use them in a docker-compose to allow us to use the same Docker Image to any environment (tests, staging, production, etc.).
Running the Application
To start the application, execute this command line:
docker-compose up -dYou will see a result like this:
Creating network "meteor-test_default" with the default driver
Creating meteor-test_my-app_1 ... done
Now you can check if the container was created and is running fine executing this command line:
docker psThe result will be:
CONTAINER ID   IMAGE                   COMMAND                  CREATED              STATUS              PORTS                                   NAMES
2bd396ec088d   my-meteor-test:latest   "docker-entrypoint.s…"   About a minute ago   Up About a minute   0.0.0.0:80->3000/tcp, :::80->3000/tcp   meteor-test_my-app_1
And you can go to the browser and access http://localhost
You'll see:
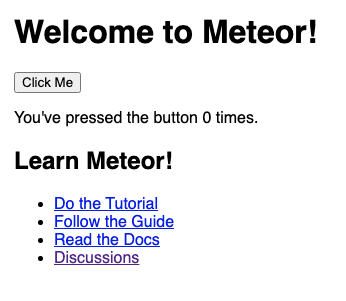
Let me know if you could publish your application using this article.
References: